Welcome to Complete GST/VAT Accounting Solution

ACCOUNTING ~ INVOICING ~ INVENTORY MANAGEMENT ~ GST/VAT REPORTS ~ ALL BUSINESS REPORTS ~ TAX FILINGS

Get 14 days Trial Absolutely FREE! | No signup. No credit card required.

Download Bookkeeper Now!
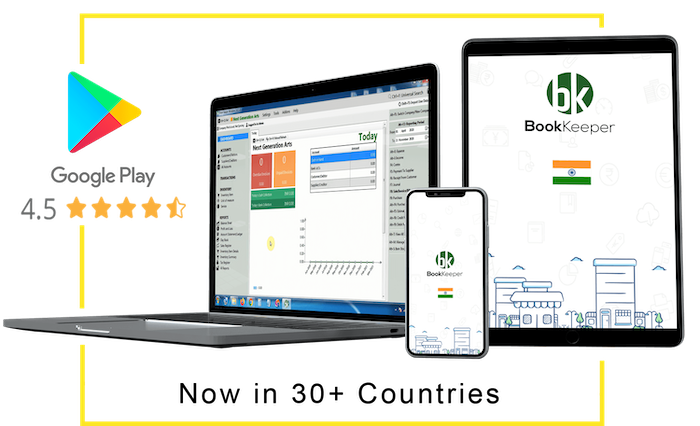
Screenshot of Bookkeeper Billing Software on a Laptop
Happy Customers

1 Crore+

Happy Customers

Free Android App

Free

Android Mobile App

Google Play Store

Rated 4.5/5

On Google Play Store

Multi-Device Support

Multi-Device

Use together on Mobile/Desktop

Multi-User Management

Multi-User

User Management Feature

WhatsApp Support

How to Use Bookeeper GST Billing for Laptop or Desktop
Skip to product information
1 of 2

Book keeper GST Software in Pakistan (Official Partner)

Regular price
Rs.16,800.00
Regular price
Sale price
Rs.16,800.00
-0%
Duration: 1 Year + 3 Month Free
Tire: Silver

Free Billing Software for PC Delivering Business Financial Efficiency

Scan Barcode for Quick Billing
Invoice Customization and Sharing
Business Custom Fields
GST Compliant
E-invoice and Eway Bill Creation
Payment Reminders
WhatsApp Personalization
Direct Print Compatibility
Cash and Bank Management
Multiple Payment Modes
Stock & Inventory Tracking
Order Management
Online Store
Multiple Business Reports
Multi-Device and User Sync

Scan Barcode for Quick Billing

Unlock in-depth business insights with Vyapar App's Multiple Business Reports feature! This robust tool allows you to generate a variety of essential reports, from sales, expenses, and profit & loss to inventory status and outstanding payments. With just a few clicks, you can access comprehensive analytics on every aspect of your business, enabling you to track financial performance, manage cash flow, and monitor trends over time. Vyapar’s reporting feature offers data in easy-to-read formats, allowing you to identify areas for cost savings, set realistic sales targets, and optimize inventory management. Gain real-time visibility across all business metrics, empowering you to make well-informed decisions that drive growth and efficiency. Perfect for businesses of all sizes, Vyapar’s Multiple Business Reports give you the power to understand your business at a granular level, streamline processes, and ultimately improve your bottom line.

Invoice Customization and Sharing

Elevate your brand with Vyapar PC billing software’s customizable invoices. Add your company logo, name, brand identity, and language preferences for a personalized touch. Create a memorable shopping experience for your customers and foster long-term business growth. Download free billing software for PC to share invoices effortlessly with the Invoice Sharing feature of the app. Quickly send invoices to clients via email or messaging apps. Enhance communication, streamline billing processes, and collect prompt payment with convenient invoice-sharing capabilities.

Business Custom Fields

If you are looking for specific fields for your business and you won’t find them, no need to worry, our PC billing software allows you to add custom fields as per your business requirements. For example, if you are running a pharmacy, you can add a Drug license number as an additional field, which will appear on your bills by default.

GST Compliant

Managing GST compliance is now simple with our billing app for desktops. It automatically applies the correct GST rates you selected, making sure your invoices are always accurate. With just a few clicks, you can generate GST-compliant invoices, and share with your customers. Our app makes GST report filing effortless. It quickly creates accurate reports, keeps your tax records organized, and provides real-time updates.

E-invoice and Eway Bill Creation

Simplify your e-invoice creation with the Vyapar Billing App for PC. Seamlessly generate e-invoices and ensure accuracy in your financial records. The app helps you stay organized, speeds up payment processing, improves record-keeping, and complies with audit requirements. Streamline your transportation with PC billing software’s E-way Bill Generation feature. Generate E-way bills seamlessly, ensuring compliance with tax regulations and facilitating smooth interstate movement of goods for your business.

Payment Reminders

Never miss a payment with the free billing app for PC’s Payment Reminder feature. Set up automated reminders to ensure timely payments from clients. Maintain healthy cash flow, strengthen client relationships, and keep your business operations running smoothly with proactive payment management.

WhatsApp Personalization

Login from your WhatsApp number on the Vyapar billing application for PC to send customized invoices, estimates, and payment reminders to customers on WhatsApp through Vyapar. This feature helps enhance customer communication by adding a personal touch to messages and sending greetings making it easier to maintain customer relationships.

Direct Print Compatibility

If the customer needs a hard copy of the bill, then our free billing app for PC supports both Regular and Thermal printers. You can instantly give print and our app provides you with 15 themes for regular printers and 5 themes for thermal printers.

Cash and Bank Management

The billing application for PC simplifies financial management by giving you full control over cash, bank accounts, cheques, and loans. It enables seamless tracking of transactions, real-time updates, and accurate record-keeping. It even lets you record loan transactions and repayments.

Multiple Payment Modes

Accept payments seamlessly with Vyapar App’s Multiple Payment Modes feature. Enable customers to pay using cash, cards, digital wallets, and more. Enhance convenience, cater to diverse preferences, and optimize sales with flexible payment options.

Stock & Inventory Tracking

Efficiently manage stock movements, FIFO, expiry, and near-expiry products with our billing app for PC. Streamline inventory by tracking dump stock and high/low performers. Set reorder points to ensure inventory stays updated and optimize operations seamlessly.

Order Management

Efficiently manage orders with Vyapar App’s Order Management feature. Streamline the entire order process from creation to fulfillment, ensuring accuracy and customer satisfaction for your business.

Online Store

Expand your reach with Computer Billing Software’s Online Store integration. Seamlessly set up and manage your digital storefront, reaching customers beyond borders. Enhance your online presence, boost sales, and grow your business effortlessly in the digital marketplace.

Multiple Business Reports

Access comprehensive insights with Vyapar App’s Multiple Business Reports feature. Generate various reports including sales, expenses, profit & loss, and more. Gain valuable analytics, make informed decisions, and optimize business performance across multiple aspects effortlessly.

Multi-Device and User Sync

The billing application for PC seamlessly syncs across devices with a Multi-device Synchronization feature. Access your data from anywhere, ensuring real-time updates across multiple devices. Enhance flexibility, productivity, and collaboration with effortless synchronization, enabling uninterrupted workflow across platforms. Our billing app for PC efficiently manages access permissions with the User Role Management feature. Define roles and permissions for each user to control data access and actions. Enhance security, streamline workflows, and ensure data integrity with customizable user role management capabilities.

WhatsApp Support
Key Features

Key Features

Easy to Use Icon

Super Easy To Use

No complex accounting terms, no need of accounting knowledge. Book Keeper is so simple and intuitive, layman can use.

Accounting + Inventory Icon

Accounting + Inventory

Create orders, invoices, record purchases & expenses. Manage complete inventory, generate barcodes, and maintain warehouses.

GST Icon

GST Invoicing To GST Filing

Generate & file GST Reports, e-Way bill, and customize VAT/Tax reports as per your country requirements.

Estimates + Invoices Icon

Estimates + Invoices Print via any Printer

Fully customizable invoices. Take print directly with Laser or Dot Matrix Printer or share on WhatsApp.

Sync Icon

Sync + Multi User

Sync across devices with fully encrypted data. Create multiple users and assign them role-based access.

Business Analysis Icon

In-depth analysis of your Business

In-depth analysis through comprehensive financial reports. 30+ financial reports to measure every aspect of business.

WhatsApp Support

How Bookkeeper Desktop App Simplifies Billing Software For PC

Description of image 1

Create & Send Invoices
In Just Seconds

Ridiculously Simple!

Book Keeper makes creating professional invoices for your business ridiculously easy. It's simple to create and customize your invoice, add your logo and send personalized invoice email to your customers.

Description of image 2

GST Invoicing se GST Filing tak
GST INVOICING + GST REPORTS + FILING + E-WAY BILL + E-INVOICING

Book Keeper provides complete GST Solution.
You can search customer GSTIN, Create GST-Compliant invoicing for Regular and Composite Dealers.
Generate GSTR reports (GSTR3B, GSTR1, GSTR2, GSTR2A Reconciliation, GSTR4 and GSTR9) & their JSON files to file directly on GST Portal.
You can also generate eWay Bill and eInvoicing directly from Book Keeper with just one click.

Description of image 3

Audit Trail

As per notification from ministry of corporate affairs, for the financial year starting at 01 Apr 2022, your accounting software must have a feature of audit trail. You can view complete audit log for all vouchers in Book Keeper.

Description of image 4

Smart Inventory Management

Inventory Management + Warehousing + Barcode Book Keeper's powerful inventory management allows for total inventory control. Keep track of inventory, enter stock issue, stock wastage and manufacturing journals. You can also generate barcodes and easily scan them using barcode scanner. Insightful inventory reports help you track inventory easily.

Description of image 5

Keep An Eye At Your Expenses & Profits
At All Times ! with 35+ Business Reports

Book Keeper powerful reporting is full of valuable information to show you exactly what you need to grow your business. 35+ different reports to measure every aspect of business. Balance Sheet, Inventory Reports, Profit & Loss, Trial Balance, Ledger, Cash Flow, Charts of Accounts and more…

Multi-Platform Integration
Zoho/ Quickbooks/ Tally/ Busy & Excel.

You can import all your Customers/Suppliers and Inventory Items from Zoho, Quickbooks, Tally, Busy & Microsoft Excel into BookKeeper. Also, you can export all your Customers/Suppliers/Items as well as transactions from Book Keeper to Tally.

Description of image 7

Sync + Multi-User
Works On Laptop/ PC/ Android/ iPhone

Sync your company across devices.
Book Keeper works on Laptop, PC, Android and iPhone as well.
Work on one device, it will appear on another automatically.
Also, you can create multiple users, assign them rights.

Description of image 8

E-Commerce Integration
Amazon/ Flipkart

Download all your sales from Amazon (India) or Flipkart and import into Book Keeper without any change. No more manually entering e-commerce sales!

Description of image 9

Integrated Payroll
Manage Payroll For All Of Your Employees

Create employees, maintain their records and define their salary structures. At month end, send them salary slips with just one click! All the accounting will be done automatically.

All Printers Supported
Laser. Thermal. Dot Matrix.

Book Keeper Windows is compatible with all your printers, whether it is Dot Matrix or Thermal Printer or Laser or inkjet printer. Just View your invoice and click Print button. Book Keeper will take care of the rest.

Description of image 11

Accept Online Payments
Debit/Credit Cards + UPI + Net Banking

Enable online invoice payment and get your QR printed on invoice and your clients can now pay you faster by scanning with any UPI compatible application like: PhonePe, BHIM, Paytm and Google Pay etc. (This option is available only in India as of now)

Description of image 11

Product Catalogue

Generate product catalogue from Book Keeper Windows, save it as PDF and share with your clients on WhatsApp or Email. So that they can check the prices, choose their favorite item and order it right from their home (especially during COVID19 pandemic)

WhatsApp Support

Looking for the Best Billing App for PC!

Take your business to the next level with Bookkeeper! Lifetime Free!

Frequently Asked Questions (FAQs’)

For mobile shop, you have to maintain all the mobile IMEI number, color & manufacturing date and even it should be printed in the invoice along with the details. So, we will look in this link from the beginning company creation, how to create IMEI for a particular mobile and which report you can check for the same.


How to Create a new Company?

Open Book keeper > Click on Create New Company > Mention all the details of the company like:

  • Company Name
  • Business type as Mobile Store
  • Contact number and Address
  • Email Address
  • Company GSTIN
  • If needed, Company logo and signature

Save the company at the end.


How to Create Customers or Suppliers?

Once the company is created, on the dashboard Click on All Accounts at left side > New Customer or New Supplier. Add the further details of the particular party. Make sure as much details you will mention while creating the party, software will fetch the same details at the time of viewing the voucher.

How to create an inventory item?

On Dashboard, Go to Inventory items > New Inventory Item > Fill up all the details of the particular item > Save it.

 You can even import all the products from excel as well in Book keeper

  • On the main Dashboard, Go to Tools > Import items/service from excel.
  • Download the Excel file and manually mention all the items in our Book keeper excel format.
  • Select the same excel file by browsing it from the local device.
  • Simply, import it.

How to Enable IMEI number in the Software.

From the Dashboard, Go to Settings > Template Settings > Item Table > Enable Batch/Expiry feature and change name of Batch to IMEI and change brand name to Color and enable Mfg Date. Disable all other columns.

Note: If you have Selected the business type as mobile store while creating the company then it will automatically enable the Batch/expiry feature and it will change the heading to IMEI, Color and Mfg date.


Lets create a purchase voucher with different IMEI number of any item

  • Go to Transactions > Click on Purchase > Create.
  • Select the Supplier name, Add the particular item in the item field > Press enter.
  • As you press enter, the window will appear in which you can define the IMEI number and other details by using the enter button and mention Quantity you have bought.
  • You can select multiple IMEIs in single purchase.


How to create an invoice and sell one item with a particular IMEI number

  • Go to Transactions > Invoice > Create.
  • Select the Customer name, Add an item in the item field and press enter.
  • It will add the same item in the item table.
  • Then again press enter > Select the IMEI number and Quantity > Continue.


How to take out the print of a voucher and mail it to the client.

Once you have created the voucher, now if you want to print and email to someone on his mail Address then follow the below steps:

  • First of all, you should have mentioned the customer email id while creating the particular account of the customer/supplier and company email id must be there in Company Settings.
  • Then view the particular voucher > At the top left side either press on Alt+P or click on print
  • For Sending to the party, just view the voucher > At the top click on @Send Email..

Now, you can track all the IMEI in Inventory tracking report.

Go to All reports > Type Inventory tracking report > Display it and you will get all the details of every IMEI number how much you have purchased and sold.

Once the report is opened, you can search the particular item wise report and it would really help in finding the final stock for a specific IMEI or color by apply the filter from the top.


How to check the reports?

  1. Day Book- In this report, you can generate a day Book that contains daily transactions, sorted by date, for a specified period. Moreover, you can apply the filters according to your own requirement.
  2. Sales register- This report provides the consolidated sales details to check the effective control on the business along with the profit of each and every sales transactions. It can displays the information of sales for a particular period as well.
  3. Inventory summary- This report gives you the total Quantity and value of all the stock. Use the filter of specific period, warehouse, category & sub-category and many more.
  4. Inventory item details- This report allows you to understand the particular item wise transactions alongside applying the filter of Account type and voucher type. Moreover, it gives you the profit of the particular item while you are selling it simultaneously.
  5. Profit & Loss report- A profit & loss report shows the profitability of the Business over a specific period of time which is commonly used on the basis of Monthly, Quarterly or Annually.
  6. Customer/Supplier list- This report is often used to check out the customer and supplier details like their GSTIN, Address, Credit period/limit and Significantly more info. Especially, Cash transaction details are also shown over here.
  7. Outstanding report- We have two specific reports for outstanding one is Receivable and second one is payable. Outstanding receivable report is for the customers from which you have to owe money and payable means that you need to pay the amount to your suppliers.
  8. GSTR1 report- This report is used for filling the return to the government every month or Quarterly of a taxpayer. It contains all your sales transactions i.e outward supplies.

All these Reports can be exported to Excel, MS Word, PDF Format.

First find out whom do you want to email the company file and why?

Unless it is not necessary, don't email your company file as it contains all your data.

If you are taking backup for yourself, then simply click on Company name > Backup company on Email and you will get your company backup file on the email id which is mentioned under Company Settings.

If you are sending your file to us then simply take a backup on mail and then forward the same at support@bookkeeperapp.net.

While sending us company file, make sure to send us from the same email id which is present in your company file. Else, we won't be able to check it.

If you are mailing us company file, it will be used for checking your issue, once you confirm us that issue has been resolved, your company file will be permanently deleted. We don't store any company file with us.

For Book Keeper Windows:

By default Book Keeper database file is saved on Desktop you can copy that file in any external drive or you can attach it on email.

To take backup on email:

a. Findout where is your company file. If you don't know where is your company file, check this article: How To Locate Company file | Where Is My Company File? | Book Keeper Windows Company File

b. Once you have located your company file, just open your email/gmail and write email id in TO and attach your company file.

You can also check this video:
https://www.youtube.com/watch?v=mm2xktOqydE

For Book Keeper iOS:

Exit your Company. You will see list of companies > Left swipe on company name > More > Backup on email, write email id in TO field and send it.

For more details you can refer to below video link

https://www.youtube.com/watch?v=8M511rVMmjU

For Book Keeper Android:

For Android, Click on three lines on top left corner in your company file

> then click on Add/Change company
It will open new screen, Click three dots against company name on home screen > Backup company > Email

Follow the below steps to generate E-Way Bill in Book Keeper:

BK Android or BK iOS:
1. Go to Transactions > Invoice > View. Select a particular invoice and click on 'Update e-Way Bill'
2. Enter the number and Save. This number appears on the invoice then.

Generation of e-Way Bill from Android/iOS will come soon.

 Book Keeper Windows:

Step1: Go to Transactions > Invoice > View. Select a particular invoice and click on 'e-Way Bill'

Step2: Fill in Transporter Details and Pincode in the form. If State and GSTIN are not coming, you need to edit customer details or company details or place of supply and fill in the required details.

Step3: Press Generate JSON, it will generate a JSON file and save it on your Desktop.

Step4: Open E-Way Bill website > in the left side menu > e-Waybill > Generate Bulk > upload JSON file which has been created on Desktop.

Step5: Upload the file and click generate.

Step6: Click Generate

Step7: A 12-digit number will be generated.

Step8: Copy this 12-digit number in the E-way bill column and save.

How to generate Automatic E-waybill from Bookkeeper: 

Step1: Visit on E-Way bill website: https://docs.ewaybillgst.gov.in/

Step2: Login to the E-Way bill portal with your E-way bill credentials.

Step3: Go to Registration > For GSP > Click on “Send OTP”.

Step4: You will get the OTP on your registered contact no. > Enter OTP > Click on verify.

Step5: Click on Add/New                                                                                               

  • Select GSP name – Adaequare info private limited
  • Select User name (Minimum 3 characters)
  • Select a password (Minimum 12 characters)
  • Click on the “Add” button

Note: Remember that User ID & Password.

Follow the below steps to generate an auto E-Way Bill in Book Keeper:

Bookkeeper Windows:

Step6: Go to Transactions > Invoice > View. Select a particular invoice and click on 'E-Way Bill

Step7:  Fill in the required information like Distance in (KM) & Vehicle no.

Step8: Click on “Auto Generate E-Way Bill”.

Step9: Mention Login ID & password of E-Way bill portal.

Step10: “Press “Enter: Login”.

You will get the E-Way no. automatically in a column of E-Way bill no.

Step11: Click on “save”.

Step12: You can view the invoice, e-Way bill no. will show on the invoice.

Step13: If you want to take a print of the E-Way bill then click on “Print E-Way Bill”

Video tutorial:
https://youtu.be/vE298QNLYiE

Generate Eway bill from Android devices is also available for Gold plan users.

Just simply Go to View all Transactions > click on 3 dots > Eway bill > click on settings icon to enter username and password. After that click on generate eway bill.

Book Keeper mobile (Android, iOS) allows you to track the location of your user/sales person. You can check from where your user has made the transaction.

You can follow below steps to enable Location Feature in Book Keeper.

1. Go to Settings > Transaction Settings > Enable location tracking of transaction?

Make sure you click on Allow when it asks you for location access, refer to below screenshot.

2. Make sure that GPS/location setting of the mobile is turned on.

3. Whenever a transaction is saved, GPS coordinates of the current location are also saved.

4. To track location, open Day Book Report. Enable 'Display Location' option given at top (Windows) or Settings button (Android, iOS)

Refer to below screenshot for details.

Now you will get a new column in report which will show you Location, you can click on that and it will take you to map and will show you location details, refer to below image.

 If you want to see location of all the transaction at the same time then you can click on 'Show all on Map' 

You can click on the red dot and it will show you details of the transaction.

In this article you will be able to get to know how to view and detailed description of Reports like Ledger report, Aged Receivable report and Outstanding report.

1. General Ledger

Account Statement/ Ledger is a detailed report for all transactions posted to each account and for every transaction there is a Credit and Debit account so it lists them all up.

The report is based on the table general ledger entry and can be filtered by many pre-defined filters like Accounts, Party details, Item Details and Period etc. This helps you to get a full update for all entries posted in a period against any account or any account group. You can also check the Opening balances as well as closing balances your account as well as account group like Sundry Debtors.

Go to Reports > Account Statement/Ledger > Display

2. Aged Receivable

This report helps you to track the outstanding amount of Customers and Suppliers as on the current date. It also provides ageing analysis i.e. a break-up of outstanding amount based on the period for which the amount is outstanding.

Go to Reports > Aged Receivable > Display.

  1. Outstanding Amount

Go to Reports > Outstanding Report > Display

This report will show the current outstanding balances as per the vouchers number.

You can apply a filter on customer’s name and account group.

 you have lost some transactions or your company file has gone corrupt, DON'T PANIC. This is a very rare situation which happens due to slow internet connection. You can easily recover your company file.

Here are various options to recover your data:

Recovery Procedure On Dropbox

(if company is syncing via Dropbox and file is corrupt or not opening):

1. Open Dropbox.com on PC/Laptop
2. Go to Apps folder > Book Keeper App folder
3. Find your company file > Click on it and choose > More > Version History
4. Find that file of yesterday which has maximum size and click restore against it.  (KINDLY DO THIS STEP CAREFULLY)
5. Now open Book Keeper and verify your data.


Recovery Procedure On Dropbox

(if company file is missing or deleted):

1. Open Dropbox.com on PC/Laptop
2. On left side, click on Deleted Files
3. If you can see some file related to your company, example: your company name.db
4. Restore that file  (check on your company file, and click Restore)
5. Restore all files related to your company
6. Now open Book Keeper in Windows and try to open these files via Open Company button
7. If you find the one file which has all your data, keep that file and you can delete rest all files


Recovery Procedure On Android:

1. Open bookkeeper app> click on download sign> restore data, go to SD card/Internal memory of admin Android device
2. goto Book Keeper folder > Auto Backup folder > it will have 10 backup of your company file, example:
    company_1.db_bookkeeper_backup
    company_2.db_bookkeeper_backup
    company_3.db_bookkeeper_backup
3. Find that file of yesterday which has maximum size and click restore against it.  (KINDLY DO THIS STEP CAREFULLY)
4. Now open Book Keeper and verify your data.


Recovery Procedure On iOS:

1. Open Demo Traders > Settings > Auto Backup
2. It will have 10 backup of your company file, example:
    company_1.db_bookkeeper_backup
    company_2.db_bookkeeper_backup
    company_3.db_bookkeeper_backup
3. Find that file of yesterday which has maximum size and click restore against it.  (KINDLY DO THIS STEP CAREFULLY)
4. Now open Book Keeper and verify your data.


Recovery Procedure On Windows:

* Open My Document in your computer > BookKeeperApp > Backup folder
* It has all your backup files, named as companyname_date_time.db_BookKeeper_Backup
ex:   abc_10_11_2016_07_45.db_BookKeeper_Backup
* Find your file carefully depending on date/time of file and size of file. 
Suppose you worked last around 7 PM, so search for file around 7 PM and of maximum size.
* Once you have got your file, copy this file to Desktop, verify your data
* then you can sync this or use in other device


If all of above method fails, then you need to restore from your backups you have taken manually.

If you go to All Accounts, it shows Profit & Loss account but values in this account will be reflected only if you have transferred some profit to capital or withdrawn some profit etc.

It doesn't show the actual/current profit of the company.

If you wish to see the actual profit of the company, go to Reports > Profit & Loss report.


If you are using old Windows, it will ask you to install .NET framework first.
Just click yes and download it first. Then run Book Keeper Windows setup.

Microsoft .NET is required for Book Keeper Windows. Microsoft .NET is preinstalled in latest version of Windows, if it is not installed, you can download it from Microsoft website. Download link for .NET framework: https://www.microsoft.com/en-in/download/confirmation.aspx?id=42642

If it shows some error 2908 or HResult 0xc8000222 while installing .NET

Kindly check this video and follow the steps.
https://youtu.be/WejR1f09YMM


Video tutorial for how to install Book Keeper Windows: https://www.youtube.com/watch?v=aCPjnGo7c9s

If you are selling goods out of India, it will come under Export category,
there can be two cases: Export Exempt or Export Taxable

In both the cases, you need to select Interstate.

In case of Export Exempt, no tax account will be selected.

In case of Export Taxable, you need to select IGST tax account.

Select Country while making Customer

Export Exempt:

1. Select Export Exempt while making sales voucher, Interstate option will be selected and you won't be able to apply any tax.

At the time of saving voucher, it will ask you shipping details. Enter required details

2. It will reflect in GSTR3B and GSTR1

Export Taxable:

1. Select Export Taxable while making sales voucher, Interstate option will be selected. Select your customer, don't fill place of supply. Select item and apply tax. After saving voucher, it will prompt for shipping details, fill in required details.

2. It will be reflected in GSTR3B and GSTR1

For creating job work entries, follow below steps:

You can enable invoice types on Settings > Template Settings > Header > Enable Invoice Type
There will two invoice headings here. One should be 'Tax Invoice'. Second should be 'Job Work'
(If you have enabled Single series from Settings > transactions Settings > Voucher series or your company file is on BKWeb then the voucher series will remain same. There is no such option to change the series for both the header)


Now, while creating the invoice, you will see an option of changing invoice type, switch to Job Work, change invoice number as per your own requirement.
After saving this job work, your inventory will get reduced.

After job work completed and inventory is back, create a Credit Note or Sales Return transaction to increase your inventory.

Book Keeper comes with FREE License Transfer, that means you can change your device as many times as you want.

To change your device, kindly follow these steps:

1. Take backup from your old device. Backup on gmail and SD-Card.

2. Download Book Keeper on new device, restore your backup and verify everything is in place. If your company is on Dropbox, then just link Dropbox on your new device and company will appear automatically.


3. To transfer license, just login on website: http://bookkeeperapp.net/log-me-in/

   Click on Welcome option available on top right side > Under My Devices, logout your old device.
    Then on New Device, open Book Keeper > Settings > Subscription Login with your email id and password.


Here’s video tutorial for your help:
https://www.youtube.com/watch?v=IQaGIgNFZAM

In case you forgot your password, reset it here:
https://bookkeeperapp.net/forgot-password/

Do let us know, if you face some issue or need some help.


Kindly note, if you are moving to different platform like from Android to iOS or from Windows to Android or iOS or vice versa, some features may be different or not available.

In most of the retail stores, there is always salesperson or salesman and owners usually want to track sales by salesperson, so that they can find out their targets, who has met the target and provide them incentives.

In Book Keeper, you need to go to Settings > Template Settings > Header and enable Salesperson.

Now salesperson field will appear while creating invoice.


Once you have started creating sales, you can track sales in Sales Register report and filter by salesperson.

For any queries you can reach us at +91 9999176746.

Usually at the end of financial year, there is requirement to transfer profit/loss to capital or withdrawing of profit.

For that you can go to Transactions > Journal > Create

Debit: Profit/Loss A/c
Credit: Capital

Book Keeper Windows supports POS feature through which you can do a little fast billing and it can save a lot of time while creating an invoice.

All you need is to:

Go to Settings > Transaction Settings > POS Settings > Enable POS system.

Under POS, we have many Settings through which the work can be smooth and swift such as,

  • Enter items first while making invoice
  • Increase Quantity while adding same item
  • Display Cash tender
  • Print Invoice After Voucher entry
  • Enable Quick receipt

Here is the video for Quick receipt feature how does it works in Book keeper:

https://www.youtube.com/watch?v=0pHLEFFGxos

  • View invoice after Voucher entry

You can enable/disable as per your convenience.

Here's video tutorial for your reference: https://www.youtube.com/watch?v=tpVqugcuGTI


You can Even take out the print from any printer as All the printers are supported by Book keeper software. Below are the two videos how you can print via Thermal Printer as well as A4/A5 print.

Free quantity is actually the difference between the actual quantity and the billed quantity. Free Quantities are given for free so it is not included in billing/accounting, however, it makes changes in-stock inventory. 

It is a type of discount that sellers may provide to their customers. This is in case they want to sell a few items to their customers for free under some schemes or offers.

To apply Free Quantity on Items in Bookkeeper refer to the following steps:


  1. Go to Template settings > Item table > Enable free Qty 
  2. Go to Transaction settings> POS > Disable increase Qty while adding the same item 
  3. Go to Transactions > Invoice > Create
  4. While creating an invoice, select items which you are selling for free. Once you have selected an item, enter the quantity which you have given to your customer for free and set the rate as 0.  
  5. For further reference, you can edit the item description to include a narration that these items were sold for free. 

After doing the above steps, your quantity will get reduced without having any effect on rates.

In Bookkeeper, we can import all data from excel however there are some specific formats for ledgers and transactions.

Import item/services from Excel

Go on Dashboard > Tools > Import item/services from Excel

There are 3 steps to import Items/Services:-

  1. Select Inventory Items/services.

­­­­­Download the sample excel file from the below link to import new items.

If you want to update the existing items then you can download existing items in excel and then update them.

Fill data in according to the fields given in the sample excel file and save it.

  1. Browse the excel file and open it to import it.

If you are updating the existing items then you need to click on Update Existing Items.

If you are importing new items then you need to click on Ignore Existing Items.

  1. Click on Start Import

Then you can check the imported items and services.


Import Customers/Suppliers from Excel

Go on Dashboard > Tools > Import Customers/Suppliers from Excel

There are 3 steps to import Customers/Suppliers:-

  1. Select Customer/Supplier/Other Accounts/Employee (For Payrolls).

Download the sample excel file from the link enclosed just below the Import type option to import Customers or Suppliers. Fill data in according to the fields given in the sample excel file and save it.

  1. Browse the excel file and then open it.
  2. Click on Start Import.

Then you can check the imported data of customers and suppliers.


Import Transactions from Excel

Go on Dashboard > Tools > Import Transaction from Excel.

Here you will get the option to import any kind of transaction shown in the dropdown list in the image.

There are 3 steps to import Transactions:

  1. Select Import Type

Download the sample excel file from the link enclosed just below the Import type option to import the transaction. Fill data in according to the fields given in the sample excel file and save it.

  1. Browse the excel file and then open it.
  2. Click on Start Import.

Then you can check the imported transactions.


You can also refer to the videos tutorial links to import data into Bookkeeper:

Book Keeper Android:

Import Accounts/Items From Excel: https://www.youtube.com/watch?v=XynoFtInPXk

Book Keeper Windows:

Import Customer/Supplier From Excel: https://www.youtube.com/watch?v=d5mDvWwgLiU

Import Items From Excel: https://www.youtube.com/watch?v=sgg_GOGOxEk

Import Transactions From Excel: https://www.youtube.com/watch?v=sx85uv8gIF0

Import Employees from Excel: https://youtu.be/2TOrQ8b4rn4

Import other Accounts from Excel: https://youtu.be/C96HjIpZ-OQ

Sometimes it is possible that Gross/Net Profit shown in Profit and Loss Statement report is not matching with Gross Profit in Sales Register. There can be several reasons for this:

Sales Register shows you the details of Invoices. It displays Gross Profit in a new column as below: Gross Profit of an invoice = Sale Price of items - Cost of items* * This cost of your Inventory Items is computed on the basis of Purchase vouchers entered for that Item or the Initial cost specified for Opening Stock & the valuation method selected (AVCO or FIFO)

Gross Profit in Sales Register considers only the cost of Inventory Item while computing profit and does not take any other business expenses incurred.

Profit and Loss Statement

Here Gross Profit = Total Sales - COGS* - Direct Expenses + Direct Income + Debit Note - Credit Note

* COGS = Opening Inventory + Purchases - Closing Inventory

Net Profit = Gross Profit - Indirect Expenses + Indirect Income

In Profit and Loss statement, various Direct/Indirect Expenses/Incomes are considered before arriving at Gross/Net Profit figure. But this is not the case in Sales Register. Therefore it is likely that the two reports show you different values for Gross Profit.

Similarly, inventory item details reports shows you the profit for every item. So, it measures profit from different angle. In short, all 3 reports may show you different profits and their use is to find out profit from every aspect.

Follow below steps to import masters from Busy to Book Keeper Windows:

1. Open Busy on your Desktop

2. Go to Administration > Data Export/Import > Data Export/Import (XML) > Export Data > Masters

3. A new window will open, choose Account or Item or both and click Export, save it to Desktop

4. Open Book Keeper Windows > Tools > Import Data From Busy > Select that file which was saved in step-3 and click Start Import.

Here's video tutorial for your reference: https://youtu.be/5m_bUCd4pNs

For importing sale/purchase transactions from Busy, your data must be in Excel format and the Excel configuration must be in the format as required by Book Keeper. Follow below steps:

1. Download the sample format of Sale transaction from Book Keeper with below steps:

Tools >  Import Transactions from Excel > Download Sample Excel File

A sample file will be downloaded on Desktop (import_sales.xls). You need to copy transaction data from Busy to this Excel file. Below is the sample format:

2. How to configure columns in BUSY for exporting sales transactions?

Follow the below steps to configure columns:

Transactions > Sales > List > Screen > Open the report


In above report, you need to add custom columns to make it compatible for importing in Book  Keeper. Click on custom column at top right for adding additional fields. Below screen appears:

Give format name as ‘ABC’. This needs to be done only once.

Click on Add New Col. It will ask for Heading, Position, Data Type, Alignment, No. of Chars, Show Total etc. You need to fill these values for 12 new columns as per below table:


New Column 1

New Column 2

New Column 3

New Column 4

New Column 5

New Column 6

New Column 7

New Column 8

New Column 9

New Column 10

New Column 11

New Column 12

Heading

Sales

Total Invoice Value

Narration/Remarks

Buyer Name

Buyer Name

Buyer Address

Sales Person Name

Local / Interstate

Place of Supply

Item Description

Discount Percentage

Tax Account Name

Position

Last Column

Add After U1

Add After U2

Add After U3

Add After U4

Add After U5

Add After U6

Add After U7

Add After U8

Add After U9

Add After U10

Add After U11

Date Type

Text

Numeric

Text

Text

Text

Text

Text

Text

Text

Text

Text 

Text 

Alignment

Left

Right

Left

Left

Left

Left

Left

Left

Left

Left

Left

Left

No. of Chars

10

16

40

40

12

10

40

16

15

40

10

20

Max Decimal

-

2

-

-

-

-

-

-

-

-

-

-

Show Total

-

Y

-

-

-

-

-

-

-

-

-

-

Show 0 As blank

-

Y

-

-

-

-

-

-

-

-

-

-

Field Value Details

Data Field

Data Field

Data Field

Data Field

Data Field

Data Field 

Data Field 

Data Field

Data Field 

Data Field

Data Field 

Data Field

Category

Inventory Voucher (Header)

Inventory Voucher (Header)

Inventory Voucher (Header)

Inventory Voucher (Header)

Inventory Voucher (Header)

Inventory Voucher (Header)

Inventory Voucher (Header)

Inventory Voucher (Header)

Inventory Voucher (Header)

Inventory Voucher (Body)

Inventory Voucher (Body)

Inventory Voucher (Body)

Field Name

VCH_TYPE_LONG_NAME

AMOUNT_GRAND-TOTAL

NARRATION 

BILLED_PARTY-NAME

BILLED_PARTY_MOBILE_NO

BILLED_PARTY_STATE

BROKER_NAME

SALE/PURC_TYPE

PLACE_OF_SUPPLY

ITEM_DESC1

DISCOUNT_PERCENT

GST_PERCENT


3. Save the above option and then click on Export button to export all transactions with additional columns to an Excel file. Below Excel file is generated:

4. We need to map the above generated Excel file as per columns in Book Keeper Excel sheet. Follow below steps:

  • Date format should be TEXT format i.e. 2018-06-08. You can change date in Excel Sheet.
  • Invoice No. should be continuous in every row. So copy invoice numbers when you have multiple items in a single invoice.
  • You can remove Units column
  • In Busy, Local and Central transaction shows with L/GST and I/GST but in Book Keeper, Local and Interstate are required, so we have to make these words.
  • Tax Rate should map with accounts already present in Book Keeper. So, we have to replace all Tax Rate like this:
  • You have to also replace Place of Supply according to Book Keeper. For example, Place of Supply is given in Busy as “Delhi (07)”, so you need to replace with “07-Delhi”.

5. Copy all the columns one by one and paste in Book Keeper sample file (import_sales.xls) then Import data in Book Keeper with below steps:

Tools > Import Transactions from Excel > Select Import Type > Sales > Select your Excel file > Start Import

For India:

You can use any 3rd Party website for sending sms, which provide REST (GET) apis for sending SMS.

Here are the steps for one of the website

1. Open http://smsalert.co.in/

2. Register and Login, you will get 5-10 credits for free. (You first need to complete operator guidelines for header and template registration)

3. Click on Right Side Menu > Developer API and generate Key

4. Open Book Keeper Windows > Settings > Message Settings

  • Enable Automatic Message
  • Click Configure and copy API key which you have generated in Step 3
  1. Now try creating an invoice, make sure customer number is without country code, Book Keeper Windows will send sms automatically to customer
  2. Once free credits are over, you need to purchase SMS credits from their website.

For Pakistan:

SENDPK.com

Here are the steps:

1. Open http://sendpk.com/

2. Register and Login, you will get 10 credits for free.

3. Open Book Keeper Windows > Settings > Message Settings

  • Enable Automatic Message
  • Click Configure and select Pakistan in country on top right corner
  • Select Website: http://sendpk.com/
  • and type username and password, which you have registered in Step 2

4. Now try creating an invoice, make sure customer number is without country code, Book Keeper Windows will send sms automatically to customer via SENDPK website.

Once free credits are over, you need to purchase SMS credits from SENDPK website.

LIFETIMESMS.com

Here are the steps:

1. Open http://lifetimesms.com/

2. Register and Login, you will get 5 credits for free.

3. Open Book Keeper Windows > Settings > Message Settings

  • Enable Automatic Message
  • Click Configure and select Pakistan in country on top right corner
  • Select Website: http://lifetimesms.com/
  • and type username and password, which you have registered in Step 2

4. Now try creating an invoice, make sure customer number is without country code, Book Keeper Windows will send sms automatically to customer via LIFETIMESMS website.

Once free credits are over, you need to purchase SMS credits from LIFETIMESMS website.

If you are on free trial, you don't have to do anything. Just take backup of your data or export your data and delete Book Keeper App.

Cancelling Subscription:

Email us at support@bookkeeperapp.net from your registered email id and we'll help you with cancellation.

In case you have subscribed monthly plan from Google Wallet then, Go to Google Play Store > Go to Accounts section > Subscription > there you can cancel your subscription..

Refund Subscription:

Book Keeper doesnt provide refund for purchases, but if you have purchased by mistake or purchased twice, you can request for refund in 24 hours.

If you have purchased on website or from Google Wallet, email us at support@bookkeeperapp.net from your registered email id and explain the scenario. Our finance team will check nd refund if applicable and update you on email. Once refund is initiated, you will be informed on email, it will reflect in your account/card in 48-72 working hours.

If you have purchased from iTunes, kindly check this link for refund:
https://support.apple.com/en-in/HT204084

nventory Adjustment voucher is an instrument that allows us to make adjustment in inventory to match the differences observed between recorded and actual inventory items in certain time duration for a particular item. In some instances, we see difference in the actual and recorded inventory due to various reasons which may be wastage, Breakage, Shrinkage, write-offs and for internal/personal use.


Let's say an example, you have lost 2 items but you cannot show it in sale, because these are not sold, then Inventory Adjustment voucher comes into picture.


To create Inventory Adjustment voucher,

Go to Dashboard > Transaction > Inventory Transaction > Inventory Adjustment


In the above mentioned voucher form, one has to select one option from add stock and reduce stock under the heading of Adjustment type followed by filling item name, quantity, rate and narration.

If you wish to increase stock, choose Add Stock and if you wish to reduce stock, choose Reduce Stock. Below table explains where to use Add Stock vs Reduce Stock.

Add Stock

Reduce Stock

We add stock, when we find actual inventory more than recorded inventory.

We reduce stock, when we find actual inventory less than recorded inventory.

It increases the total quantity available in the records.

It decreases the total quantity available in the records.

Causes:
Found any lost item, error in estimating the projected production etc.

Causes:
Item lost, error in estimating the projected production, wastage, Breakage, Shrinkage, write-offs and for internal use etc.

Affects Inventory Level but not accounts

Affects Inventory Level but not accounts

This is valid only for local companies]

By default company file is saved on Desktop.

If you are unable to locate kindly follow below steps.


If your company file is syncing via Dropbox, it will always be in
Dropbox > Apps > Book Keeper App folder.


If your company file is local,

1. open Book Keeper Windows

2. Take your mouse on Company name,
    kindly note, just take mouse on company name, don't click anywhere.

3. It will show you company name and location in tooltip as shown below.

4. Open that location and there you will find company file.

5. Once you have located the company file, you can take backup, just copy this file to your Pendrive or email to yourself.

A Credit Note, is a legal document just like an invoice or a purchase order, that suppliers provide to customers to notify the customer that credit is being applied to their account for any number of reasons. It’s a way to issue full or partial refunds for invoices that have already been issued or paid.


You may issue a credit note to your customers because:

  • The customer returned goods or rejected services for any number of reasons
  • There was a mistake in price on the original invoice
  • There was an over payment on the original invoice
  • The goods were damaged in some way during transit


Recording a Credit Note In Book Keeper

Case 1: Where goods have been returned-

Step1- Go to Transactions > Credit Note > Create new

Steps2- Select Customer Account > Add the items and define the quantity that has been returned and on the value on which they have been returned.

Step3- Click on Set off Against invoice > Select the voucher and define the value of Goods returned in Amount to Pay Column And Save.

Case2: Where invoice value needs to be adjusted without return of Goods.

Step1- Go to Transactions > Credit Note > Create new

Steps2- Select Customer Account > Change the mode Credit note to On total mode > Define the Adjusted Amount in the Sub total Field > Enable Tax Checkbox > Select the Tax Slab.

Step3- Click on Set off Against invoice > Select the voucher and define the value of Goods returned in Amount to Pay Column And Save.

WhatsApp Support

Get in touch

Email

Contact@Noor-k.com

Address

Kalyar Traders, Wasu Rd, Mandi Bahauddin, Punjab Mandi Bahauddin, Punjab, Pakistan-50400